In Part 1 we looked at why systems move to events, and in Part 2 we worked through the Outbox Pattern and how Change Data Capture delivers the messages.
This post is the hands-on one. We’re going to actually run it, end to end. I’ll assume you’re comfortable with Docker and a terminal. I won’t explain every command, but I will explain what each piece is doing and why it’s there.
By the end, you’ll be able to save an order in Postgres and watch the event appear in Kafka.
What we’re building
The whole point of the Outbox Pattern with CDC is that your application only ever writes to its database. A separate tool watches the database’s change log and publishes the events for you.
Tech Stack:
- Postgres, DB with logical replication turned on so the change log can be read.
- Redpanda, a single-container, Kafka-compatible broker. It is much lighter to run than full Kafka, which keeps this demo simple.
- Kafka Connect with Debezium, CDC tool. This is what reads Postgres’s change log and turns new outbox rows into events.
- Redpanda Console, a web UI so we can actually see the event.
Four containers, docker compose up.
Step 1: docker-compose.yml
services:
  postgres:
    image: postgres:16
    environment:
      POSTGRES_USER: postgres
      POSTGRES_PASSWORD: password
      POSTGRES_DB: shop
    ports: ["5432:5432"]
    # wal_level=logical is what lets Debezium read the change log.
    command:
      - "postgres"
      - "-c"
      - "wal_level=logical"
      - "-c"
      - "max_replication_slots=4"
      - "-c"
      - "max_wal_senders=4"

  redpanda:
    image: redpandadata/redpanda:latest
    command:
      - redpanda
      - start
      - --smp=1
      - --memory=1G
      - --reserve-memory=0M
      - --overprovisioned
      - --node-id=0
      - --check=false
      - --kafka-addr=PLAINTEXT://0.0.0.0:9092,OUTSIDE://0.0.0.0:19092
      - --advertise-kafka-addr=PLAINTEXT://redpanda:9092,OUTSIDE://localhost:19092
    ports: ["19092:19092"]

  connect:
    image: quay.io/debezium/connect:3.0
    depends_on: [redpanda, postgres]
    environment:
      BOOTSTRAP_SERVERS: redpanda:9092
      GROUP_ID: "1"
      CONFIG_STORAGE_TOPIC: connect_configs
      OFFSET_STORAGE_TOPIC: connect_offsets
      STATUS_STORAGE_TOPIC: connect_statuses
    ports: ["8083:8083"]

  console:
    image: redpandadata/console:latest
    depends_on: [redpanda]
    environment:
      KAFKA_BROKERS: redpanda:9092
    ports: ["8080:8080"]
The one line that matters most here is wal_level=logical on Postgres. That’s what makes the change log readable by an outside tool. Without it, Debezium has nothing to watch.
Now:
docker compose up -dGive the containers a moment to settle, the Connect service in particular takes a little while to be ready.
Step 2: the tables
Two tables: orders for the actual data, and outbox for the events.
The column names on the outbox table aren’t arbitrary. Debezium’s Outbox Event Router (which we’ll turn on in a moment) looks for these specific names by default: aggregatetype, aggregateid, type, and payload. Notice there’s no “published” or “sent” column. We don’t need one, because nothing is polling this table for unsent rows, Debezium reads the change log directly.
CREATE TABLE orders (
    id        UUID PRIMARY KEY,
    customer  TEXT NOT NULL,
    total     INT  NOT NULL
);

CREATE TABLE outbox (
    id             UUID PRIMARY KEY,
    aggregatetype  TEXT  NOT NULL,   -- e.g. "Order"; used to pick the topic
    aggregateid    TEXT  NOT NULL,   -- which order this event is about
    type           TEXT  NOT NULL,   -- e.g. "OrderPlaced"
    payload        JSONB NOT NULL    -- the event data
);
Save that as schema.sql and apply it:
docker exec -i $(docker compose ps -q postgres) \
  psql -U postgres -d shop < schema.sql
Step 3: tell Debezium what to watch
We register a connector with Kafka Connect that points Debezium at our outbox table and switches on the Outbox Event Router, the transform that reshapes a raw row insert into a clean event and routes it to a topic.
{
  "name": "outbox-connector",
  "config": {
    "connector.class": "io.debezium.connector.postgresql.PostgresConnector",
    "tasks.max": "1",
    "database.hostname": "postgres",
    "database.port": "5432",
    "database.user": "postgres",
    "database.password": "password",
    "database.dbname": "shop",
    "topic.prefix": "shop",
    "plugin.name": "pgoutput",
    "table.include.list": "public.outbox",
    "key.converter": "org.apache.kafka.connect.json.JsonConverter",
    "key.converter.schemas.enable": "false",
    "value.converter": "org.apache.kafka.connect.json.JsonConverter",
    "value.converter.schemas.enable": "false",
    "transforms": "outbox",
    "transforms.outbox.type": "io.debezium.transforms.outbox.EventRouter",
    "transforms.outbox.route.topic.replacement": "order.events"
  }
}
A couple of things worth pointing out: table.include.list tells Debezium to only care about the outbox table (not orders), and route.topic.replacement sends every event to a single topic called order.events to keep things simple.
Save that as register-connector.json and post it to the Connect API (wait until Connect is actually up first):
curl -X POST -H "Content-Type: application/json" \
  --data @register-connector.json \
  http://localhost:8083/connectors
Step 4: the application
And here’s the part that always surprises people the first time. This is the entire application side. It saves an order and an outbox row in one transaction, and then it’s done. There is no publishing code, no Kafka client, nothing about events leaving the program. Debezium handles all of that.
Okay I already have UV installed so. I did just uv init and uv add psycopg2-binary to install the library inside a folder.
import json
import psycopg2          # pip install psycopg2-binary
from uuid import uuid4

conn = psycopg2.connect(
    "dbname=shop user=postgres password=password host=localhost port=5432"
)

def place_order(customer, total):
    order_id = str(uuid4())
    # ONE transaction: the order and the event are saved together or not at all.
    with conn:
        with conn.cursor() as cur:
            cur.execute(
                "INSERT INTO orders (id, customer, total) VALUES (%s, %s, %s)",
                (order_id, customer, total),
            )
            cur.execute(
                """INSERT INTO outbox (id, aggregatetype, aggregateid, type, payload)
                   VALUES (%s, %s, %s, %s, %s)""",
                (
                    str(uuid4()),
                    "Order",                 # -> routed to the "order.events" topic
                    order_id,
                    "OrderPlaced",
                    json.dumps({"order_id": order_id, "total": total}),
                ),
            )
    print(f"saved order {order_id} + outbox event in one transaction")

if __name__ == "__main__":
    place_order("random", 4200)
Run it:
pip install psycopg2-binary
python producer.py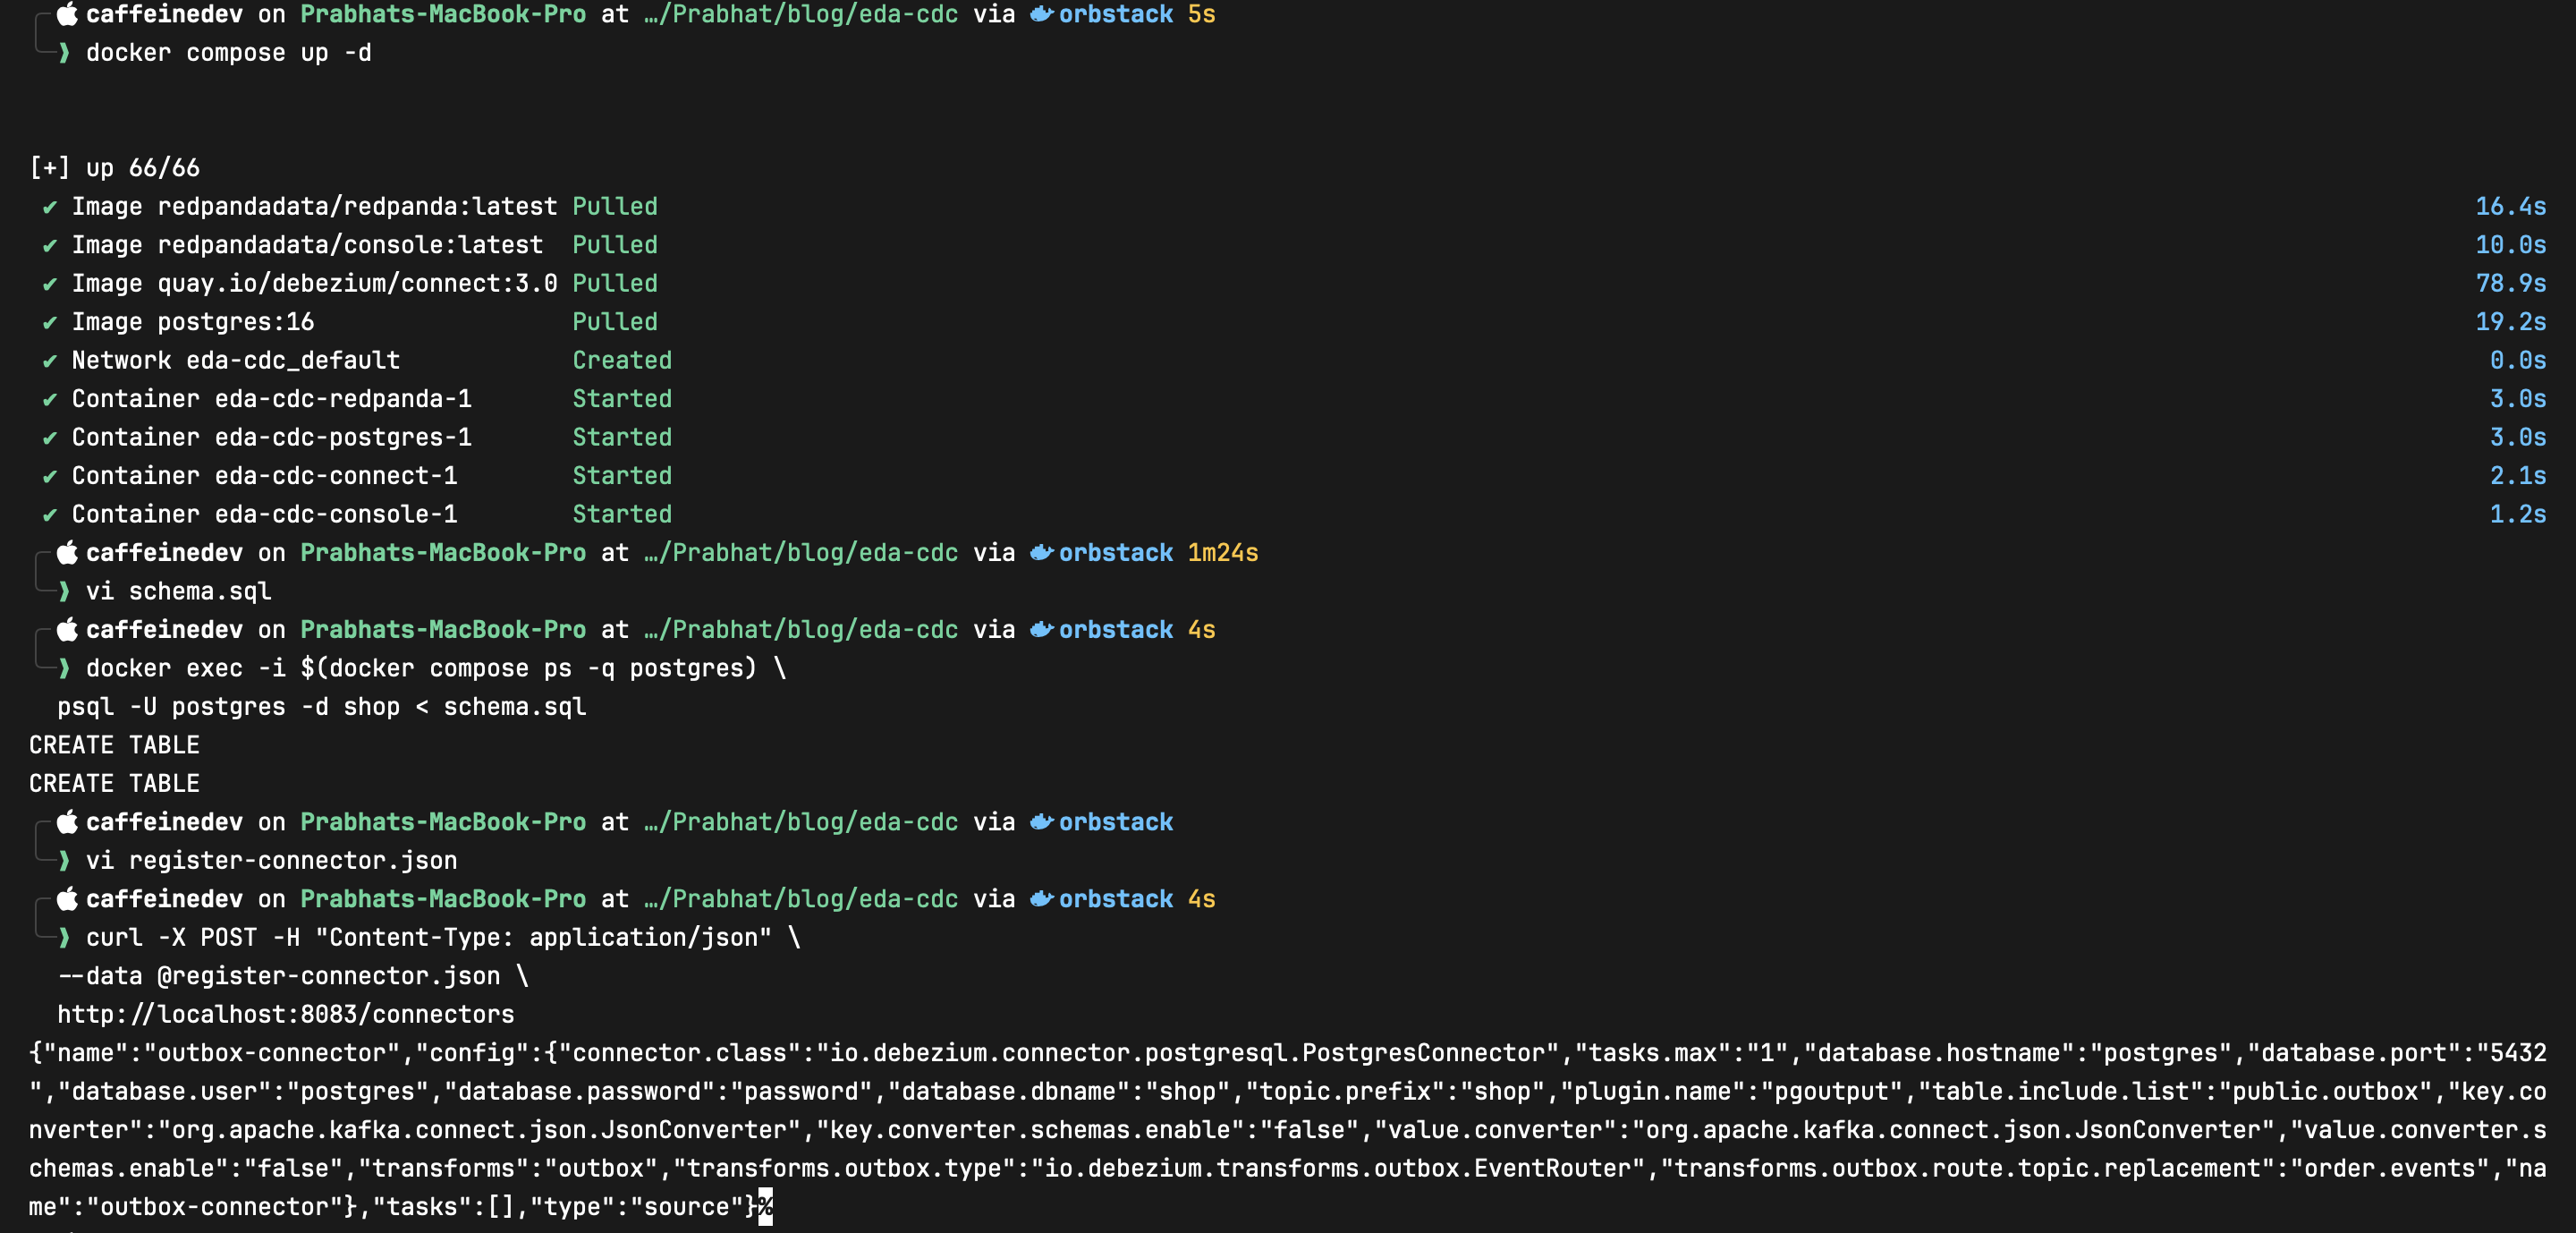
Watch it work
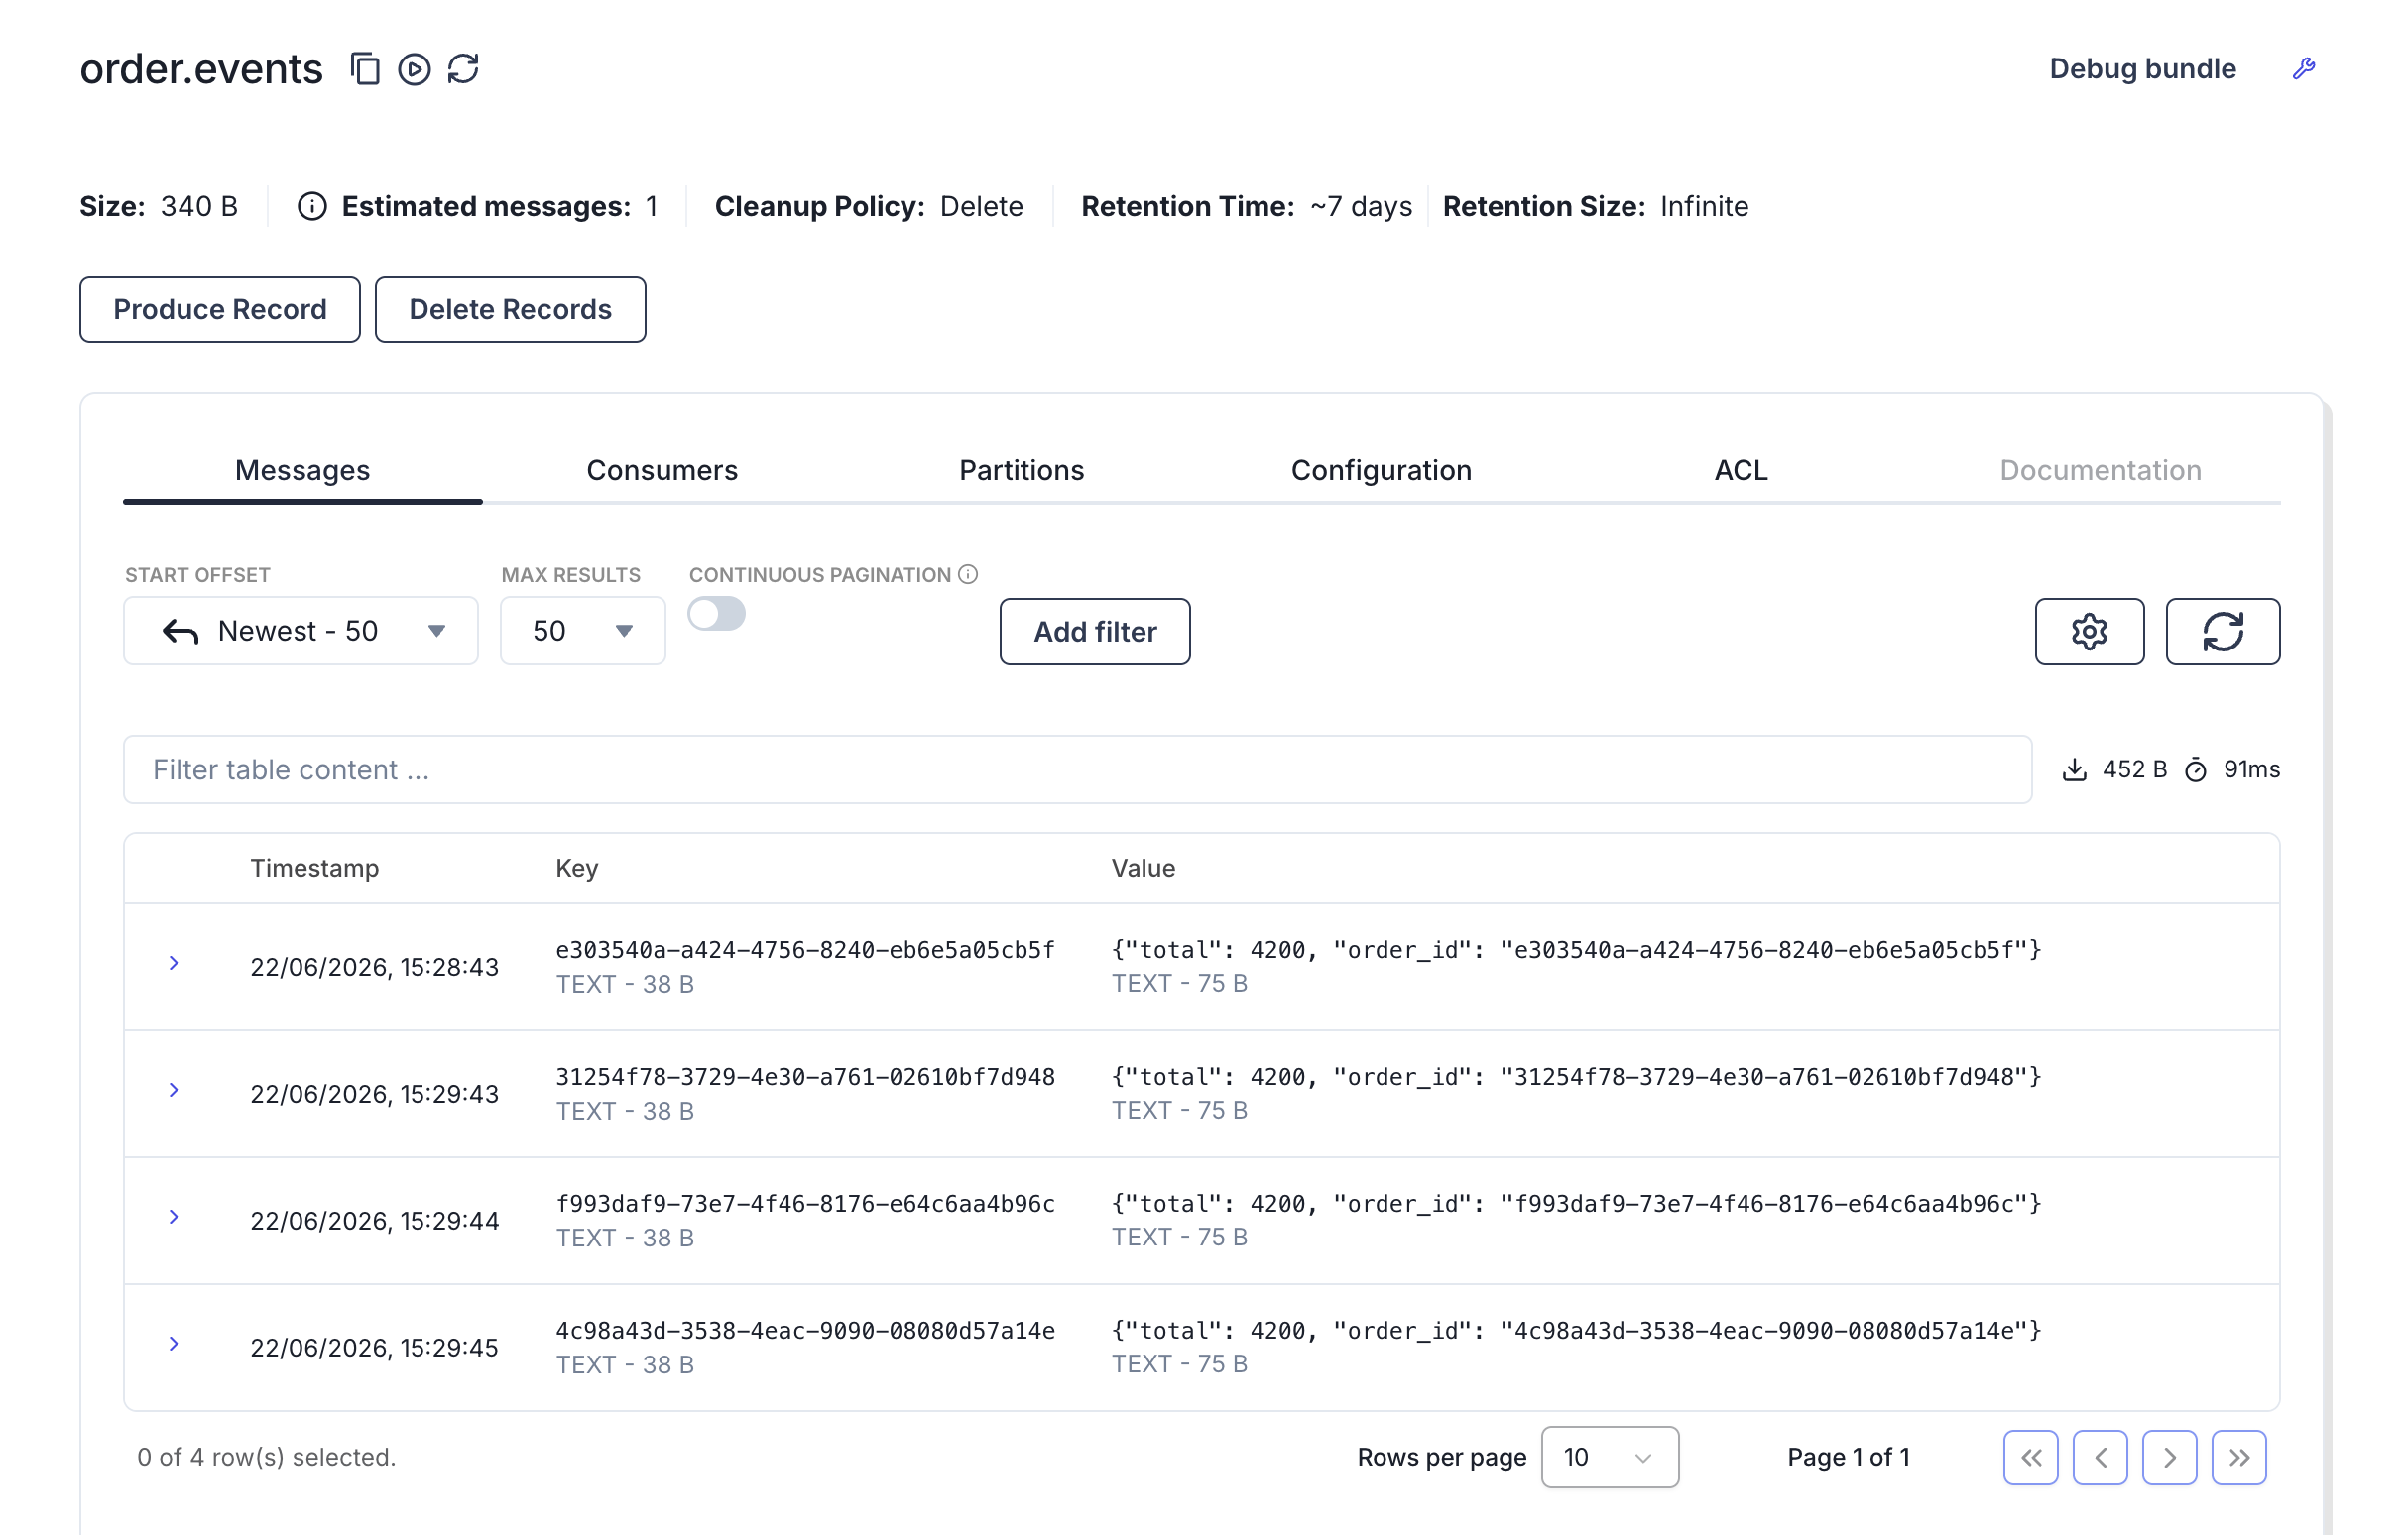
Open the Redpanda Console at http://localhost:8080, go to Topics → order.events, and you’ll see your OrderPlaced event sitting there, landing within milliseconds of running the script, even though your code never opened a connection to Kafka.
Run producer.py a few more times and watch new events stream in live.
What just happened
Tracing it end to end:
- Your script wrote two rows, the order and the outbox event, in one transaction. Both landed or neither would have.
- Postgres recorded that commit in its change log (the write-ahead log it keeps anyway).
- Debezium was tailing that log, noticed the new outbox row, and the Outbox Event Router reshaped it into a clean event.
- The event landed in the
order.eventstopic, ready for any consumer to pick up, with zero sending code in your application.
That’s exactly the flow we described in Part 2, now actually running.
A couple of things to keep in mind
Running it doesn’t make the trade-offs from Part 2 disappear.
This is still at-least-once delivery. If Debezium restarts and re-reads part of the log, a consumer can see the same event twice. So any consumer you build on top of this still needs to be idempotent. A common approach is to track the event IDs you’ve already handled and ignore repeats.
Running the demo is a good moment to internalize that this isn’t optional.
Two more practical notes:
- Cleanup. The outbox table keeps growing. One approach is to delete the row in the same transaction after inserting it. Debezium has already captured the insert from the WAL, so the event is still emitted
- Privileges. Debezium needs replication rights on the database. The postgres superuser has them, which is fine here, but in production you’d create a dedicated user with just the permissions it needs.
Wrapping up
If you got the event to show up in the console, you’ve now run the same pattern people use in production systems, just on a much smaller setup. The setup gets bigger, but the basic flow stays the same.
That wraps up the series. Part 1 covered why event-driven systems exist, Part 2 covered the Outbox Pattern itself, and this post showed it running end to end.
Thanks for reading.